Category: artistic endeavors


New Home!!!

So, I have moved with 2 of my daughters to a suburb of Minneapolis, MN. 

Yeah…so!!!

I met up with dressmaker Molly O’Brien and her husband at the Irish Fair of Minnesota this weekend, and it was just wonderful! I am still rather gimpy after 2 surgeries for a hip replacement, but it was so good to finally meet Molly in person. I cannot get over how nice folks are here…I can now honestly say that I consider the DC metro area to be composed of way too many “snakes” (my sister’s word) as compared to all of the immensely good-natured people that I have met here in 11 days!! The fair itself was so laid back and easy…if this keeps up, I will be very happy here.

Working on new designs…ready to work. Contact me with your ideas!!!

Purchasing and using Taoknitter Arts Designs

FYI: All digitized design file sales are for single use on solo dresses to be sold, or unlimited use for personal purposes not involving re-sale. If designs are for team dresses, multiple OTR solo dresses, or other retail items, the unlimited use license is 3 times the file price.  Files cannot be re-sold; violators will be prosecuted. 

It is important that all clients, from the beginning embroiderer to the professional, are happy.  We are here to fix files, trouble-shoot stitch-outs, answer questions, etc.   All questions, problems, & comments can be sent to taoknitter@gmail.com. Please be aware that because of the digital nature of purchases made from me, there are no refunds.  However, I will do everything in my power to make sure your files work beautifully.

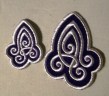
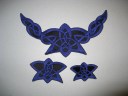
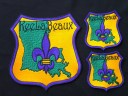
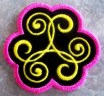
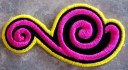
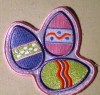
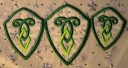
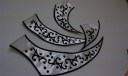
All of the Taoknitter Arts Irish Dance Dress Embroidery Designs are digitized and ready for you to use on your own embroidery machine.  All embroidery formats are supported.  Embroidery services are also available for those without embroidery capabilities or if your hoops are too small for a specific design.  All designs can be split, revised and/or re-sized for you needs.

You can see all of the currently available designs on Flickr (http://www.flickr.com/photos/taoknitter/).  There are some newer ones that are still in the process of being digitized, but if you want something that I have not finished yet, I will finish it for you.  The full design sets (with all of the individual pieces) are only visible to Flickr contacts that have been designated “friends,” so if you would like to see everything, create a Flickr account for yourself and then add me as a contact and friend.  I will designate you as a friend when I am either notified by Flickr or you.

Facebook

Re-sizing, Revising, Splitting 

These charges are in addition to the initial cost of the designs.

  1. Simple re-sizing: Free
  2. Design revision: $5-$50 (depends on complexity of revisions)
  3. Splitting: $7-10 per split file (depends on complexity of the splitting).

Custom Designs & Custom Digitizing

If you just do not see what you want in the Taoknitter Arts collection, we can start from scratch! We are available to discuss your dress ideas, to work with your concepts or create one for you, to answer questions about achieving great looking embroidery, to troubleshoot stitch-outs if necessary, etc. We can also do your embroidery for you.  As accomplished dressmakers and embroiderers, we are here to support the Irish Dance Dressmaker/Embroiderer whether you are a newbie or an experienced professional. Please contact Ann at taoknitter@gmail.com to get started.

Also, if you want to design your own unique dress, we can help you do that! Custom, one-off designs that you provide me can be digitized from jpeg, bmp, png, vector graphics, etc.  I do not use the auto digitize feature as it always fails to produce a neat product, especially when dealing with the complicated overs and unders of Celtic knots.  Digitizing prices range from $3/1000 stitches (if digitizing from clear, symmetrical, and proportioned graphics) to $4.50/1000 stitches (if working from hand drawn design “ideas” that require more attention).

Let me explain the pricing range: while hand-drawn designs can be clearly presented, there is usually added time to interpret and work through the whole design to ensure that correct line widths are being used consistently and that the correct symmetry applies where needed.   The only way to cut that down and reduce cost is to send me clear vector graphics with the lines already drawn to the correct widths and all elements presented symmetrically; however unless you can do that yourself, that will cost you as much or more than the stitch digitizing!  I do have several clients who send designs to me that way which means I can quickly give a more accurate estimate (which is again something hard to do with hand drawn designs), and eliminates the additional cost, but I also know they do that work themselves. I do not require vector graphics as I am experienced working with hand drawn designs, but it does cost more in terms of time and labor.

The total cost of digitizing your own design can range anywhere from $25 to $1000 depending upon the complexity of the work and the final stitch count. The final design and embroidery files belong to you after payment is made, and will not be re-used or sold by Taoknitter Arts. Please email taoknitter@gmail.com to start the process.
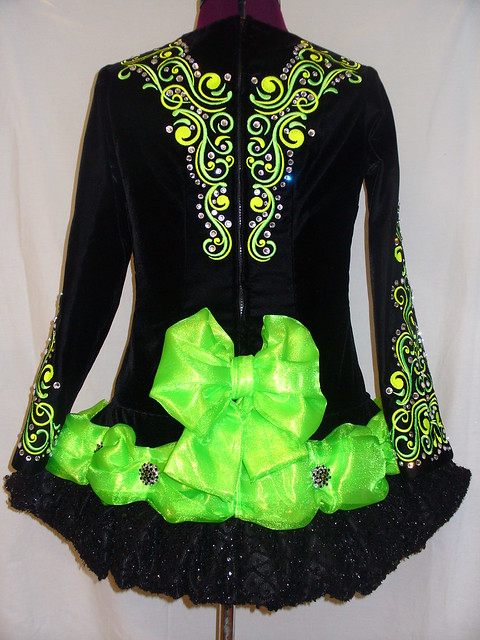
Embroidery

Any design can be stitched onto fabric you have interfaced, stabilized, and marked accordingly (see directions here: https://taoknitterarts.com/2011/04/21/pursuing-the-perfect-embroidery-stitch-out/)

If your dress is done, appliques are your best option (for more information, please click here: Custom Appliques), but if it is not, embroidering directly onto your pieces is more economical.  The cost for this can range from $75-700 depending on the design and total number of stitches.There is of course the cost of the designs to add to that.  Keep in mind that even if you want an element stitched onto the skirt 20 times, you only pay for that design once.

Embroidery costs are:

  1. $1.00/1000 stitches using rayon or polyester thread plus the cost of thread
  2. $1.50/1000 stitches using metallics (no super-twist) plus the cost of thread
  3. $2.00 per 1000 stitches for applique designs plus the cost of thread

These prices include extra stabilizers used with the hoops. If I cannot do your embroidery for you, I have contacts, but they have their own pricing.  Please email taoknitter@gmail.com for more information.


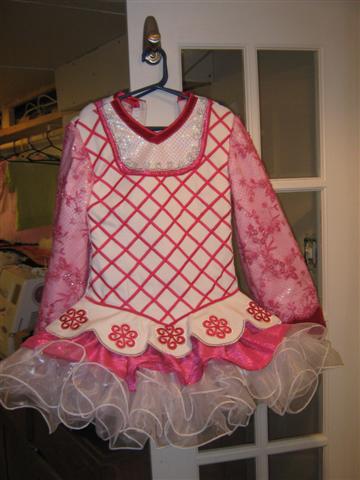
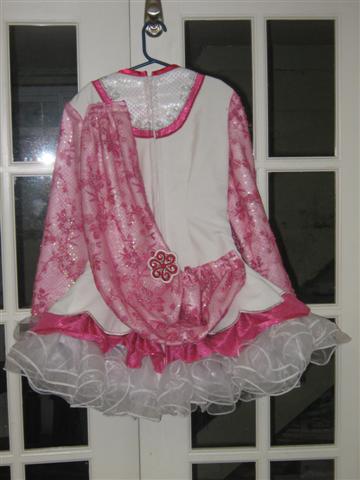
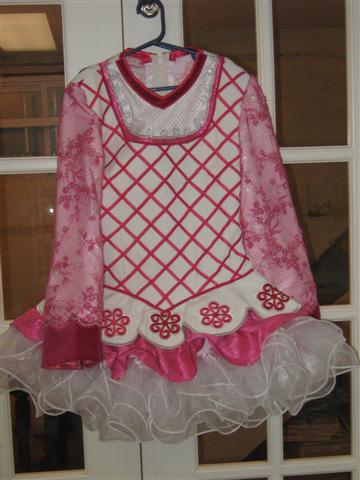
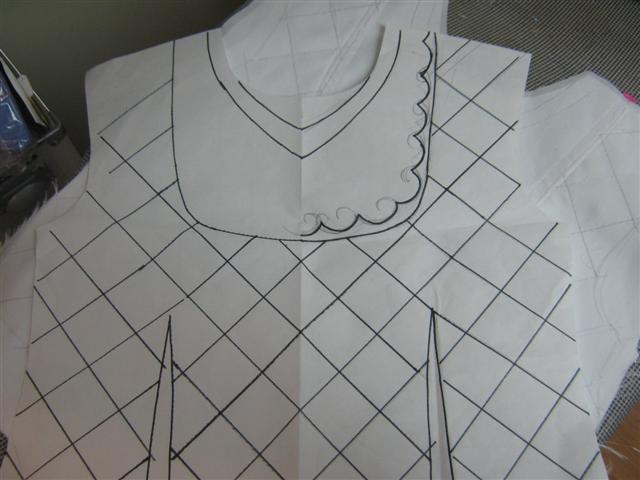
Still to come: how to prep your fabric to send to me for embroidery…for now, here is a bit of info:

 https://taoknitterarts.com/2008/10/22/interfacing-and-stabilizing-fabric-for-embroidery/  The password is taoknitter. As for the design, once I get your fabric and see the area to be embroidered, I will make it fit.  Just make sure to trace your pattern piece onto the prepped fabric.If you send me swatches of the colors you want for thread, I can match it.  If you do not have swatches, if you go to to fabric store and choose colors from the Sulky embroidery thread, I can convert to the thread I use.

If you are interested in any of these designs for your next Irish Dance dress, please contact me at taoknitter@gmail.com.

AD 43

AD 44

AD 45


AD 46

If you are interested in any of these designs for your next Irish Dance dress, please contact me at taoknitter@gmail.com.

Musing

I suppose it all applies:

“When you are going through Hell…”


(Changing the date of this post from its original 1/22/2009 to today so that it moves up in my list since folks have been asking for this info rather a lot lately!


Part 1: Prepping the fabric


Irish Dance dress embroidery…nowadays there is no clear cut definition of what this should look like.  It used to consist mainly of recognizably Celtic designs, but now anything can serve as inspiration for embellishing a solo dress.  The only consistent factor is its inconsistency!


But the one thing we embroiderers want is to have a clear, smooth product.  One definite challenge in achieving this is the Celtic knot in all its forms.  The complicated series of overs and unders presents unique considerations because the stitch out does not happen in a smooth, unbroken fashion.  To accommodate the changing overlaps, a digitizer, and hence the embroidery machine, must move from place to place to establish the unders before going back to form the overs.  This disjointed stitching creates uneven pulling on the fabric which can create puckering and warping of the fabric which then contributes to joins that do not match.  Below is an example.


double knot braid broken


Very often a factor in this issue is fabric that is not hooped tightly enough so that the fabric cannot be moved.  Are some hoops better than others?  Most likely…I know that the hoops I use for my commercial machine are better than the hoops for my home embroidery machine at holding the fabric.  But because I was tired of seeing my Celtic knot designs out of alignment, I found a way around this.  (This is also a way to deal with fabric that cannot be hooped without damaging it like velvet.)


First, the fabric must be interfaced and then stabilized with fusibles.  For those of you thinking this does not seem conducive to creating a comfortable costume for dancing, well, you are correct!  Most Irish Dance dressmakers do their best to make these dresses as comfortable as possible, but in some instances the amount of embroidery dictates a certain stiffness that the dancer is more than happy to deal with in the name of Irish Dance fashion.  And, because so many skirts  are actually very stiff or have stiff parts, this heavy stabilizing actually helps achieve the desired crisp look.


Most importantly, though, this interfacing and stabilizing helps the fabric stand up to what can be very dense stitching.  Whether or not your base fabric is stabilized with a fusible interfacing (tricot or woven) is totally up to you.  I personally feel that all fabric, including the heavy velvet, will support embroidery better if it is first interfaced with a fusible.  I do remove as much stabilizer as I can from the bodice and sleeves and soft skirts when the embroidery is done, but the interfacing remains to give the base fabric the body and support it needs both as clothing and as the base for the embroidery.


After the fabric is interfaced, I fuse Pellon Decorbond to the areas to be embroidered.  This is fairly stiff interfacing which helps support the stitches.  Yes, there is softer, cheaper stuff, but I have found it does not work as well as I want it to.  The excess Decorbond can be cut away, which is what I do, or it can be left to help achieve the level of stiffness desired.


Your fabric can be embroidered two different ways: uncut and cut to size.  When doing the embroidery for clients who will be making the dress themselves, I ask that they send me rectangles with the pattern piece traced on the  stabilizer so that I can make sure the design is sized correctly. For myself, however, I cut the pieces out to size before embroidering because I use my patterns in my digitizing software to ensure correct sizing and placement; some of the professional dressmakers that I have worked extensively with also send cut pieces to me since by now we have individual sizing systems in place.


 To illustrate, I am using the center front panel of  a three panel dress.  This has been cut out and the silver pleats already sewn and fused in place.  

Pics sept 30 023 by you.


Below is the wrong side, interfaced with a fusible tricot fusible.

Pics sept 30 026 by you.


This next pic shows the piece stabilized with Decorbond.  The center of the area to be embroidered is marked by the vertical line.

Pics sept 30 027 by you.


Next to be marked in this case is the lower edge of the design.  I mark this place for this design because I want all of the skirt designs to be 1 inch from the finished hem.

Pics sept 30 029 by you.


Part 2: The Sticky Stuff

I use a LOT of this stuff  when  I am using my Bernina –
Photobucket

For my bigger commercial hoops, I use the same type of material from a very large roll.

If you look online for tutorials involving sticky stabilizer, you are told to cut your length of the stabilizer and then put it, paper back and all, into the outside hoop.  You are then told to score an area and pull off the paper to expose an area that you can adhere your fabric to.

I dislike this method because ultimately the hoop loses tension on the stabilizer (the paper is slippery!), and the fabric being embroidered can, and usually does, start to pucker and shift, especially when doing the complicated overs and unders of a Celtic knot.

I will illustrate what I do using one of my large hoops for my commercial machine.Pics sept 30 009 by you.

As you can see above, having come off of a roll, the stabilizer is curled.  To get started, I lay the inner hoop ring right side up on the paper side of the sticky back to flatten the curl as shown below.

Pics sept 30 010 by you.

Then, I begin to pull the paper backing off the piece of sticky stabilizer.Pics sept 30 011 by you.

With the hoop still weighing the stabilizer down, I pull the paper off one end.Pics sept 30 012 by you.

Then I move the hoop end onto the exposed sticky stabilizer.Pics sept 30 013 by you.

I rub the stabilizer onto the bottom and a bit of the side of the hoop.  Then, holding the hoop, I pull the rest of the paper off so that the hoop “catches” the stabilizer.Pics sept 30 014 by you.

Attaching the stabilizer evenly around the hoop can take some patience.
This next pic shows the sticky back attached tightly…when I thwack it with my finger it sounds like a drum. Pics sept 30 015 by you.

Next, I cut a piece of tear away stabilizer…

Pics sept 30 016 by you.

…and then hoop the whole shebang.

Pics sept 30 020 by you.

Part 3: Getting that fabric placed correctly!

Now I am ready to place the fabric.  I am going to line up the reference lines drawn on the fabric with corresponding lines that I stitch out onto the sticky stabilizer.


These are the placement lines stitched out onto the sticky back.

Pics sept 30 033 by you.


To refresh, here are the reference lines on stabilized piece.

 Pics sept 30 027    Pics sept 30 029


I begin by folding back the fabric at the junction that the two lines cross, and then I attempt to line up that fold with the the corresponding place on the stabilizer.Pics sept 30 035 by you.


It does take a bit of jockeying back and forth from end to end to get it lined up on both the x & y axes.  The pic below shows I am on track here…Pics sept 30 039 by you.


…but not at the other end.Pics sept 30 037 by you.


So, I shift until I get this straight…Pics sept 30 038 by you.


…then check the other end again…Pics sept 30 039 by you.


…press it down to check the horizontal alignment…Pics sept 30 036 by you.


… and I am done!

Pics sept 30 040 by you.


Before I begin embroidering the actual design, there will be a basting box sewn around the embroidery area.  This anchors the fabric securely in place to further reduce any shifting or puckering.  You can read a bit more about that here:  Basting Boxes .  Also, to help alleviate the sticky build up and reduce thread breaks,  I hoop a length of waxed paper under the sticky back…you can read about that here: Waxed Paper


Another new dress, this one made by Mary Jo Farr of Trefoil Designs.  

I did the embroidery, fooling with the design to get what MJ wanted.  This is one of my designs, a diagonal (obviously), based  on TA-AD 1.  I will get it up in the store soon, but as usual, if you want it sooner rather than later, email me.

I love doing these dress, MJ!!  This is one of the prettiest we have done yet!

Also have the first ribbon bodice digitized.  This can be either a stitch fill or an applique.  I will get it in the store, but it is available sooner if you want it.

Susan Gowin Ribbons bodice 01Susan Gowin Ribbons bodice 02Susan Gowin diagonal ribbons 2Susan Gowin Ribbon motif 01Susan Gowin diagonal ribbonsSusan Gowin diagonal ribbons 3
Susan Gowin armor 8 asym bodiceSusan Gowin Chest armor 8aSusan Gowin Chest armor 8eSusan Gowin armor 8 element 1Susan Gowin armor 8 element 2Susan Gowin armor 8 border c
Susan Gowin Chest armor 8cSusan Gowin Chest armor 8iSusan Gowin Chest armor 8jSusan Gowin Chest armor 8 - individual elementsSusan Gowin armor 8 border bSusan Gowin Chest armor 8d
Susan Gowin armor 8 element 3Susan Gowin Chest armor 8fSusan Gowin Chest armor 8bSusan Gowin Chest armor 8gSusan Gowin Chest armor 8hSusan Gowin armor 8 border a

To be digitized: Susan Gowin, a set on Flickr.

I have put pics of new designs by Susan Gowin on Flickr. Most of these are not digitized yet, but if you see something you want, please just let me know and I will get it done! Email me at taoknitter@gmail.com.

Dressmaker & Embroiderer: Terri Epperson, Majestic Dress: Custom Irish Dance Dresses
Embroidery Designer & Digitizer: Me


Just wonderful, Terri!!

Slowly but surely, yes, new things are happening.  I decided last year that I needed to make Taoknitter Arts designs available for automatic purchase and download…and the site is up!  Little did I realize what an extreme undertaking this was going to be!  The sheer time involved in just getting designs ready, converted and then uploaded has been staggering.  So, the site does not have the full catalog of designs up yet, but we will get there.

You can see the new site here – Taoknitter Arts: Irish Dance Dress Designs & Embroidery

Photos of all the designs can still be seen on Flickr.  If you want to see all of the design parts with dimensions and prices, just write to me at taoknitter@gmail.com and I will make it happen.

And I have recently updated my Customer Creations gallery with all of the fantastic work done by dressmakers using Taoknitter Arts designs.  I am so impressed!  Please visit Customer Creations to see all of the creativity!  If you have a dress and a happy dancer to add to the gallery, please just let me know.

So, what is to become of this blog?  I will use this one for Irish Dance dress embroidery information to separate it from the other Taoknitter blog about actually sewing Irish Dance dresses – Taoknitter: Sewing Irish Dance Dresses

I hope I can keep it all straight!

I have yet to meet a design that cannot be made into an applique!!! Many clients who inquire about them will end up sending the fabric for me to embroider the design directly onto, but some want the appliques so they can fool with placement if they want, while others want the appliques first so they can design around them! Sometimes the dress is already done so applique patches are a necessity, and then there are just times when placement of a separate applique is simply easier for some than lining up the fabric (like a skirt) in the hoop.

The photos below shows some of the applique patches I have made for others as well as for my own work. I have also made patch files for other dressmakers that also come with directions for making and applying them.

So, whether you want patches made for you or want to make your own, it can be done. For more info, please write to me at taoknitter@gmail.com .

(The author of this post, Paddy Kelleher, has graciously allowed me to post this tutorial which is fantastic.  Thank you, Paddy!)
For this embroidery I consulted the talented Summerset. She uses a lot of lattice in her wearable art pieces so I asked for some advice, which she graciously provided.
Lattice satin stitch all-over embroidery
The pattern is on left. On the right is a tracing on reverse on right. Again I have used a satin fused with cotton interfacing for the base, with the upper fabric in a cotton velvet. The darts are marked on the bodice and thread traced through all layers.

[Irish+construction+001+(Small).jpg]

I sewed on the pink applique at neckline to have an end point for the embroidery. Sometimes you end up with a gap otherwise. The straight stitching lines follow the grid. This stablizes the layers and shows where to stitch.

[Irish+construction+005+(Small).jpg]

Keeping the line straight to do the stitching was a challenge for me. I wanted to stitch at an angle. I also found it better to stitch over the straight line with the line being just covered at one side by the stitching. If I tried to centre it I got crooked.

[Irish+construction+006+(Small).jpg]

I did not go through the dart area because I wanted to do as much as possible in the flat. I left one square blank on the side of the dart and then finished the stitching once the darts were sewn.  The stitching in flat nearly completed. I kept missing areas and would have to go back to them.
[Irish+construction+010+(Small).jpg]
[Irish+construction+011+(Small).jpg]
The darts are sewn, the fused satin was trimmed away and the dart was catchstitched open.
[Irish+construction+008+(Small).jpg]
[Irish+construction+007+(Small).jpg]
Dart is sewn and the gap in embroideryshows. It looks like my lines match up-Yay!
[Irish+construction+013+(Small).jpg]
Stitching complete, but the bodice hasn’t been trimmed to size yet. This dress is still in production, so I will get some pictures up once it has been completed.
ETA: Here is the completed dress…beautiful, Paddy!

If you look online for tutorials involving sticky stabilizer, you are told to cut your length of the stabilizer and then put it, paper back and all, into the outside hoop.  You are then told to score an area and pull off the paper to expose an area that you can adhere your fabric to.

I dislike this method because ultimately the hoop loses tension on the stabilizer (the paper is slippery!), and the fabric being embroidered can, and usually does, start to pucker and shift, especially when doing the complicated overs and unders of a Celtic knot. I hate puckering and will do all I can to avoid it. I have yet to have a perfect embroidery sample, but I am working on it.

I will illustrate what I do using one of my large hoops for my commercial machine, but the same idea can be used on home embroidery machines.


As you can see above, having come off of a roll, the stabilizer is curled.  To get started, I lay the inner hoop ring right side up on the paper side of the sticky back to flatten the curl as shown below.


Then, I begin to pull the paper backing off the piece of sticky stabilizer.

With the hoop still weighing the stabilizer down, I pull the paper off one end.

Then I move the hoop end onto the exposed sticky stabilizer.

I rub the stabilizer onto the bottom and a bit of the side of the hoop.  Then, holding the hoop, I pull the rest of the paper off so that the hoop “catches” the stabilizer.

Attaching the stabilizer evenly around the hoop can take some patience.

This next pic shows the sticky back attached tightly…when I thwack it with my finger it sounds like a drum.

Next, I cut a piece of tear away stabilizer…

…and then hoop the whole shebang.

(Since I now mainly use a rectangular border frame which means there is nothing to hold the tearaway in place, I just wait until I am ready to stitch to slide the tearaway under the hoop.  The basting box or placement lines or even just the first stitches of a design catch the tearaway and hold it in place.  And since the sticky back does cause a buildup on the needle that causes more thread breaks, I have taken to adding a piece of waxed paper  from the baking section in between the sticky back and the tear away.  This keeps the needle lubricated so that I have very little build up and very few breaks.) 

You will notice when stitching out designs using the sticky back stabilizer that I have added a basting box around the design.  In the pic below, you can see the faint line of the basting box.

There is a new thread on Celtic Flame about stealing designs.  A dressmaking mom writes that another mom in her school told her she was wasting her time coming up with her own designs because there was so much to COPY on the internet.  When she first wrote, she alluded to a website that sells embroidery, so I wondered if she might be talking about Taoknitter Arts.

An answer that she just posted to another reply makes me think she is talking about my website.

Big sigh. 

Susan and I have hashed out the pitfalls of posting clear pics of the designs since I started.  She has dealt with this issue far longer than I have, and I respect her viewpoint, her advice and her experience.  I will not bore you, or myself, by re-visiting  the mental gymnastics (complete with teeth gnashing) that helped me arrive at the current presentation of the designs on my website.  If you look at it, I think you get it.

But, I do want to say that I know I take the risk of people copying things.  I have this tendency to believe that all folks are inherently honest and honorable.  I do, routinely, get blind-sided by self-serving idiots with an overdeveloped sense of entitlement, and I sometimes finally get really irked by stupidity and mean-spiritedness, but I have yet to see a change in my basic trust.  I now know what it sounds like when Susan shakes her head at me over the phone.

It would make me crazy to try to police things or try to find a more complicated way of managing the designs.  But let me be clear, copying a design is stealing and I am not shy about approaching the thief and making it public if I have to.  I did, by accident, see an exact copy of a dress I made for my daughter.  Susan designed it for us.  The design was never made available, but there it was, perfectly copied on someone else’s dress.  When I contacted the overseas dressmaker, she was great about it, very sorry, and told me that the design had been given to her by the dancer. 

I get contacted rather often by dancers who send me pics of designs from other dresses, even BN dresses, wanting THAT design digitized.  Sometimes I get a design “created by the dancer” only to be led by the dressmaking gods to pics of the EXACT design on a finished dress…that blows my mind.  Once I explain that I will not copy because it is both unethical and illegal, they usually calmly explain that they did not know that and we go forward.  Only once did I not hear back after my refusal…I think that was embarrassment.

I do think most folks either do not know or really do not think about it.  One poster on CF wrote: ” I think the problem is that most people don’t equate “appropriating” someone’s design as stealing because they don’t physically take something.  It isn’t like shoplifting where you actually take something in your hand.

It’s more like cheating on a test.

Ask your friend if she encourages her dd to copy her neighbor’s answers on exams in school. Why not? It is just what she did. She used someone else’s work and passed it off as her own.

Ask her if she’s going to brag about how she aquired her designs – Wow look what I copied off of the internet and I didn’t have to pay for it! If someone asks her where the design came from, is she going to say “Oh I digitized it myself” or something equally evasive. If she’s so proud of her cleverness, why not tell all?

Ask her if she thinks the TC will be happy if she finds out the design was lifted. Is she OK with her school being known as the one where it is OK to rip off other people’s dresses?”

Interesting viewpoint.

Susan made me laugh when she pointed out that truly, the only thing I should worry about is if someone else’s poorly digitized “copy” was thought to be mine!  Now that would be a drag!

There was also a point made by someone about using designs from a site on the internet.  She wrote: “While there are a couple of sites out there that have drawn up several dress designs specifically for irish dancing use, you have to remember then, that your dress won’t be an original. Chances of running into another dancer with the same pattern are slim but just something to keep in mind.

That mind set has never occurred to me!!  Yes, yes, I know that the conversation about whether or not a BN dress is really custom when they re-use designs in part or in whole pops up routinely.  But, it has always been my assumption that each dressmaker brings a totally different perspective to making a dress and so it will be rare that 2 dressmakers will use the same design the same way let alone the same fabrics.  In fact, what I love about my clients is that they always do something I did not envision.  Very often, they ask me to modify the designs by taking something out, putting something else in, taking it apart or trying something new with a piece of something else!  I love it.

Still, I guess that is a concern for some people.  I appreciate that.  And I also thoroughly appreciate my creative dressmaking clients.  Thank you for spurring me on!

I thought that the above might have been a rant…I guess it was just a bit of mental popcorn…

There are a couple of links in this brief post about Copyright Law: Substantial Similarity.

Big, big, multiples sighs…the Sneetches are at it once more.  Dressmakers are being accused of “highway robbery” again. So that I can maintain a detached, calm stance, I am going to assume that is mainly directed at the BNs (big names).

It has not yet been said in the voy board post to which I am referring that “it is only embroidery for pete’s sake, not the artistic applique of not-so-long-ago!” Let me be clear here that I am in awe of the MANY appliqued works of art that were done without the benefit of digitizing. Susan Gowin’s work stuns me every time, and I drool over The Silverlode dresses. Amazing. I completely appreciate the time and artistic talent.

By the same token, all the embroidery that we are seeing on the dresses these days is equal in the amount of time and even talent that it takes to create the designs, digitize them well, and then stitch them out (ok, maybe there is no artistry in using a computerized machine, but it is still time intensive and takes mechanical understanding and skill). The look is different now, yes, but no less costly than the applique wonders of before. In fact, in terms of the embroidery itself, I would guess that there is in fact more embroidery on dresses now than ever before!

And that is not cheap. Why? Because good digitizing takes lots of time. But, unless you are a digitizer, how and why would you know that?

My sister-in-law is a crafter. She came to me to ask if she could use the embroidery machine. When she saw my confusion because I know she does not know how to use one, she said, “It’s easy, isn’t it? Don’t I just feed in a picture of what I want?” She is a smart person so she quickly understood it was not simple when I explained a bit, but it dawned on me that perhaps many folks assume that we ID dressmakers and embroiderers do just feed in the pictures and sit back. My favorite board comment has always been the one that stated dressmakers should not make so much money because all of their machines are computerized now…the implication being that we just throw all of the ingredients at the machines and they suck it up and spit a complete dress out the other end?!?!?! I wish!!!

Now, there is something called the “auto-digitize” function in many, if not all, of the digitizing software packages. However, this is rarely a successful way to create good embroidery files.  Auto-digitizing leaves tell-tale signs that affect the integrity of the embroidery.  Good digitizers use it rarely if at all.  (I did a post about auto-digitizing here.) 

When I first started my digitizing education, I looked carefully at the designs I had bought for myself.  I deconstructed them and learned mainly what not to do…don’t use auto-digitize!  Many (most?) of the celtic knot design sets out there are created using that auto button.  How can I tell?  Because the knot file itself is full of strange thread detours, junctions, shapes & lines, and the embroidery is just as asymmetrical and mis-shapen as the original hand drawn sources found in the clip-art sources…yep, clip art.  But, the open secret in embroidery of using clip art as a starting point is a post for a different day. 

I know that the economy is bad. I have so many clients buying digitized designs so that they can make their own dresses. Some of them have me do the embroidery for them because they do not have the equipment or big enough hoops. My Taoknitter Arts email box is hopping with correspondence with people of all experience levels wanting to do for themselves. It’s great!

But there have been several exchanges, a few of them very lengthy, with people who have asked for estimates based on some pretty intensive design re-working. They also wanted me to stitch them out. When I gave them the estimates, however, these people disappeared. I have been mulling this over…why would folks assume a full dress of dense stitching would only cost $20?

I asked one of my outspoken dressmaker friends (she is also my embroidery tester) what she thought about this.  I have edited a bit to protect the innocent, but this is what she had to say:

When I was looking at your site the other day, I made note of the prices. I thought, $30 for this bodice design, $20 for the matching panel and probably another $20 for whatever I decided to put on the sleeve. Total: $70.00. When I bought just the drawing for a design from a well-known ID designer a while back, I paid $50 for just the rights to use the design and then knew I would have to have it digitized. Lucky me was in the position of being your official tester already, so I was testing it for you anyway, but if I had to send that off to 24-hour digitizing.com, or some other digitizing company, can you imagine what I would have paid to have JUST the front panel done?? I figure $75-100 and that doesn’t count the front bodice or shawl clip.

The industry standard for stitching out a design is $1 per 1000 stitches.  Folks who know that using metallic thread can be tricky charge $1.50 per 1000 stitches when using metallic threads.  This includes the cost of the hoop stabilizers and machine use.  Some people charge a set-up fee which can encompass the digitizing or just doing the test stitch outs before the actual run.  I do not charge a set-up fee…if there is a digitizing fee I say so up front and that is usually only when it is an exclusive custom design.

Digitizing fees are more which makes sense because bad digitizing gives you a bad product!  I have seen fees as low as $2 per 1000 stitches but those also seem to ask for perfect vector art work which leads me to believe they try to use auto-digitize as much as possible…or they have slave labor!  My fees run $3-4.50 depending on the artwork (hand-drawn takes more time to deal with).  $4 is about standard while I have seen some places that charge as much as $7.50 per 1000 stitches.

Someone just wrote this past week to get an estimate, and because of my friend, I was able to point out that while the stitch-out of an entire stitch-dense design from my site might run $350 to $450, if I had to digitize the entire design for her, it would cost at least twice that and therein lies the expense for solo dresses!  It takes TIME to create, digitize, manipulate, re-size, test, revise, test again, revise again, and then finally stitch out the design onto the dress pieces.  Believe me, if I could get Dr. Suess to make me a perfect embroidery contraption into which I could feed all of the elements and then sit back as it whirred and chugged and then belched out a finished product with the current necessary bling on its belly button, I would!

I do realize that this is a scary time.  It is for all of us.  I just wish the Sneetches would ask for info before labeling ID dressmakers as thieves.  I can guarantee that it is a rare non-BN dressmaker who makes even sufficient money doing this.  I certainly hope they exist.

Irish Dance dress embroidery…nowadays there is no clear cut definition of what this should look like.  It used to consist mainly of recognizably Celtic designs, but now anything can serve as inspiration for embellishing a solo dress.  The only consistent factor is its inconsistency!

But the one thing we embroiderers want is to have a clear, smooth product.  One definite challenge in achieving this is the Celtic knot in all its forms.  The complicated series of overs and unders presents unique considerations because the stitch out does not happen in a smooth, unbroken fashion.  To accommodate the changing overlaps, a digitizer, and hence the embroidery machine, must move from place to place to establish the unders before going back to form the overs.  This disjointed stitching creates uneven pulling on the fabric which can create puckering and warping of the fabric which then contributes to joins that do not match.  Below is an example.

double knot braid broken

Very often a factor in this issue is fabric that is not hooped tightly enough so that the fabric cannot be moved.  Are some hoops better than others?  Most likely…I know that the hoops I use for my commercial machine are better than the hoops for my home embroidery machine at holding the fabric.  But because I was tired of seeing my Celtic knot designs out of alignment, I have developed for myself a specific way of preparing for the embroidery.

First, the fabric must be interfaced and then stabilized with fusibles.  For those of you thinking this does not seem conducive to creating a comfortable costume for dancing, well, you are correct!  Most Irish Dance dressmakers do their best to make these dresses as comfortable as possible, but in some instances the amount of embroidery dictates a certain stiffness that the dancer is more than happy to deal with in the name of Irish Dance fashion.  And, because so many skirts  are actually very stiff or have stiff parts, this heavy stabilizing actually helps achieve the desired crisp look.

Most importantly, though, this interfacing and stabilizing helps the fabric stand up to what can be very dense stitching.

Whether or not your base fabric to be embroidered is stabilized with tricot or woven fusible interfacing is totally up to you.  I personally feel that all fabric, including the heavy velvet, will support embroidery and function better in general if it is first interfaced with a fusible.  I do remove as much stabilizer as I can from the bodice and sleeves and soft skirts when the embroidery is done, but the interfacing remains to give the base fabric the body and support it needs both as clothing and as the base for the embroidery.

After the fabric is interfaced, fuse Pellon Decorbond to the areas to be embroidered.  This is fairly stiff interfacing which helps support the stitches.  Yes, there is softer, cheaper stuff, but I have found it does not work as well as I want it to.  When I receive fabric that uses inferior stabilizer, I then have to fuse Decorbond myself which adds to the cost.  The excess Decorbond can be cut away, which is what I do, or it can be left to help achieve the level of stiffness desired.

You can send the fabric to me to be embroidered two different ways: uncut and cut to size.  I prefer uncut because there is always some “shrinkage” of the fabric caused by the embroidery.  That is not to say that there will be noticeable warping (I work very hard to achieve a smooth, non-puckered result!), but it is better to cut your newly traced pattern piece after the embroidery is done to ensure that the piece is the correct size and shape.

If you are sending me a large, uncut piece, please mark the area and orientation to be embroidered.  It must all be interfaced and stabilized.

If you are sending me a cut piece, the piece of Decorbond should be bigger than the embroidery by at least 3 inches on each side.  Once it is securely fused, there are placement lines to be drawn so that I can embroider the design in the right place.

To illustrate, I am using the center front panel of  a three panel dress.  This has been cut out and the silver pleats already sewn and fused in place.  (As stated above, sending uncut pieces is preferable.  I am using a cut piece here to better illustrate marking it.)

Pics sept 30 023 by you.

Below is the wrong side, interfaced with a fusible tricot fusible.

Pics sept 30 026 by you.

 This next pic shows the piece stabilized with Decorbond.  The center of the area to be embroidered is marked by the vertical line.

Pics sept 30 027 by you.

Next to be marked in this case is the lower edge of the design.  I mark this place for this design because I want all of the skirt designs to be 1 inch from the finished hem.

Pics sept 30 029 by you.

On the fabric that you send me, I will need the center line for every design and then one more line or mark for placement of the edge of a design.  For the skirt and sleeves, the distance from the hem should be shown.  For the bodice, the distance from the finished neckline should be shown.

I will send the embroidered pieces back to you with the Decorbond untrimmed.  I do trim it away from the embroidery because I feel that the décorbond pulls and wrinkles when it is ironed several times during the construction process.  Again, it is up to you whether or not you keep the excess Decorbond.